

Have you ever looked at a pair of plain leather boots and wished they had a bit more personality? You’re in the right place! Transforming your footwear with leather painting is a fun and creative project that anyone can do at home. It’s a fantastic way to revive an old pair of boots, how to paint leather boots easily create a custom look that matches your style, or even make a unique art piece for home decor. This guide will walk you through every step, making it easy to turn your vision into a wearable reality.
Understanding Leather Boots and Paint Compatibility
Before you dip your brush in paint, it’s important to understand what makes for a successful project. The key to a lasting finish is paint adhesion. Most new paintable leather shoes come with a protective factory finish made of waxes or oils. This coating must be completely removed to create an ideal surface for the paint to stick to.
Which type of paint works best for leather boots? You should always use acrylic paints specifically formulated for leather, as they are flexible and durable. Preparing your leather boots correctly is just as important as the paint you choose, as this initial step ensures your custom design won’t crack or peel over time. Now, let’s explore the types of leather you might be working with and the best paints for the job.
Types of Leather Used in Boots
While there are many types of leather, their suitability for painting largely depends on the texture and finish of the material. Smooth leathers are the best candidates for customization. These paintable leather shoes provide an even canvas for your designs, allowing the paint to go on smoothly and evenly.
The surface of the leather is the most critical factor. Leathers that are heavily textured, oily, or treated with silicones will resist paint. For this guide, we are focusing on dyeable or paintable smooth leather shoes, as they offer the most predictable and satisfying results for beginners and experts alike.
Understanding your boot’s material is the first step. Here is a simple breakdown of leather suitability for painting:
| Leather Characteristic | Suitability for Painting |
|---|---|
| Smooth, Dyeable Leather | Ideal, as it provides a clean and even surface for paint. |
| Textured (e.g., Suede) | Not recommended, as paint can clump and ruin the texture. |
| Oily/Waxy Leathers | Possible, but requires very thorough prepping to remove the finish. |
Best Paints for Leather Boots
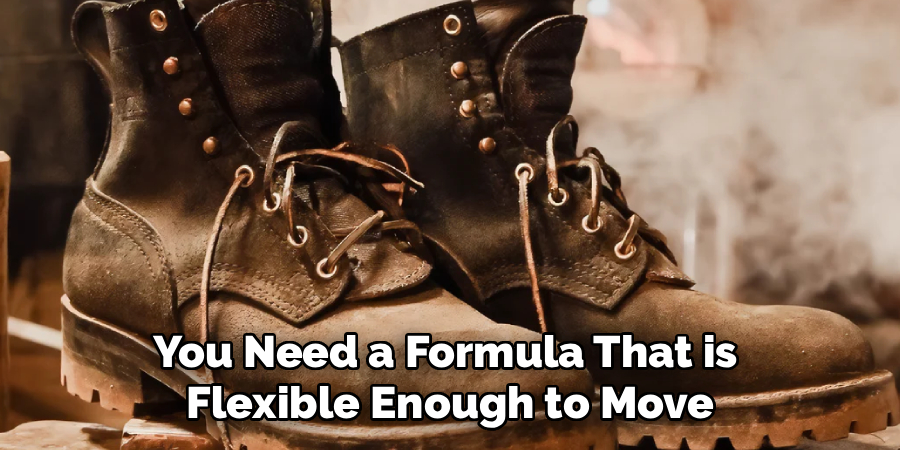
When it comes to painting leather, not just any paint will do. You need a formula that is flexible enough to move with the leather without cracking or peeling. Which type of paint works best for leather boots? Without a doubt, acrylic leather paints are the industry standard for their durability and ease of use.
We highly recommend Angelus Leather Paints. This brand is specifically designed for customizing footwear and offers a wide range of products that deliver professional-quality results. These paints are water-soluble, making cleanup easy, and they come in a dazzling array of vibrant colors that dry to a beautiful, lasting finish.
The best part about using a product like Angelus is the creative freedom it offers.
- They are designed not to crack or peel.
- They can be mixed to create any
custom coloryou can imagine. - They can be thinned with water for applying smooth, thin layers.
- No special solvents or equipment are necessary for cleanup.
Gathering Your Materials and Preparing to Paint
Now that you understand the basics of leather and paint, it’s time to get ready for the fun part. Having all your essential supplies laid out before you begin makes the entire process smoother and more enjoyable. A little preparation goes a long way in ensuring your project is a success from start to finish.
You’ll need a way to clean and prep the leather, your chosen paint colors, and tools to apply them. This includes a good leather cleaner or leather preparer, the paints themselves, and a finisher to seal your work. Let’s look at exactly what you should have on hand.
Essential Supplies and Tools Needed
Gathering your tools is the first active step in your painting journey. The good news is that you don’t need any expensive or special equipment to get started. Most of the items are readily available and simple to use. For the best results, using a cohesive line of Angelus products is recommended, as they are designed to work together.
You’ll primarily need a preparer, paints, and a finisher. For application, simple paintbrushes or sponge brushes work perfectly. You’ll also want a soft cloth for buffing your boots at the very end. Avoid using materials that aren’t intended for leather, as they may not provide the durability you need.
Here are the essential supplies you’ll need to gather:
- Leather Preparer & Deglazer: A product like Angelus Leather Preparer & Deglazer is crucial for stripping the factory finish.
- Acrylic Leather Paint: Your chosen colors of Angelus Leather Paint.
- Paintbrushes: A few flat or sponge brushes for application.
- Acrylic Finisher: To seal and protect your final design.
- Polishing Cloths: A soft, clean cloth for applying the finisher and for polishing.
Preparing Leather Boots for Painting
How do I prepare leather boots before painting them? This is one of the most critical stages. Proper preparation ensures that your paint will adhere correctly and last for a long time. The goal is to remove any waxes, oils, or silicone from the factory finish, which acts as a barrier to the paint.
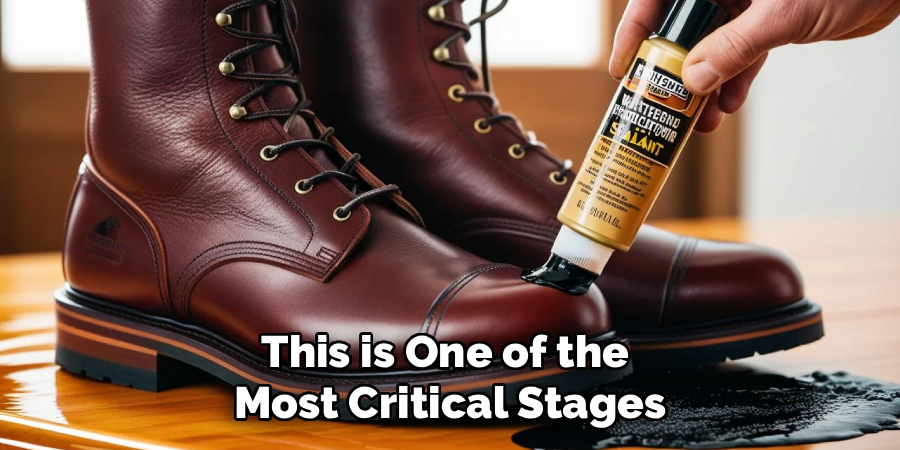
You can use a dedicated leather cleaner and preparer for this step. Angelus Leather Preparer & Deglazer is made for this exact purpose. If you can’t find it, a solvent like isopropyl alcohol or acetone applied with a cotton ball will also work. Rub the surface of the boot until it feels clean and looks slightly dull.
This process creates a slightly rough surface that the paint can grip onto effectively. Remember, any quality shoe polish or creams should only be applied after the entire painting and sealing process is complete. Your prepped surface should be clean, dry, and ready for its first coat of color.
4 Step-by-Step Guide to Painting Leather Boots
You’re prepped and ready to go! Now we get to the exciting part: bringing your design to life. Following a clear, step-by-step process is the easiest way to manage leather painting projects and achieve the best results. Don’t rush—patience is your best tool for a flawless finish.
We’ll break down the process into four simple stages: cleaning and prepping, applying your colors, adding custom details, and finally, sealing your work for long-lasting wear. Let’s start with the foundation of any great paint job.
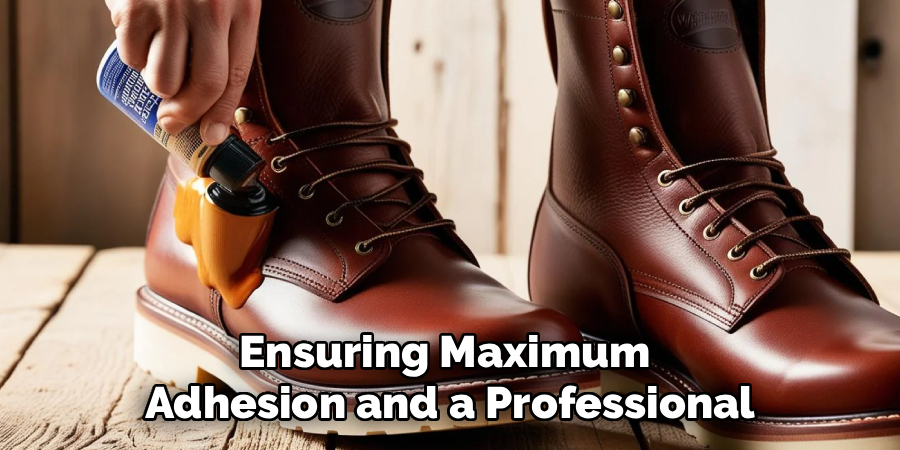
Step 1: Cleaning and Prepping the Surface
As we’ve mentioned, solid leather preparation is non-negotiable. This step ensures that the paint can bond directly with the leather, preventing future cracking or peeling. To begin, grab your Angelus Leather Preparer and Deglazer and a cotton ball or cloth.
Thoroughly rub the entire surface of the leather you plan to paint. You’ll notice the shiny factory finish starting to disappear, leaving a dull, matte look. This is exactly what you want. The deglazer works by stripping away any interfering substances like oils, waxes, and silicones that were applied during manufacturing.
Once you’ve prepped the boots, allow them to air dry for a few minutes. The surface should not feel sticky or tacky. This clean canvas is now perfectly primed for your first layer of paint, ensuring maximum adhesion and a professional-looking result. This is the definitive answer to “How do I prepare leather boots before painting them?”
Step 2: Applying Base Coats and Colors
With your boots prepped, it’s time to apply the paint. The secret to a smooth, even finish is to apply multiple thin layers rather than one thick coat. Start with your base coats, applying the paint with a flat paintbrush or sponge brush. A light touch is all you need for the first layer.
Allow the first coat to dry completely before applying a second coat. This usually takes about 15-30 minutes. Applying paint too thickly can lead to a tacky finish and an increased risk of cracking. If you’re mixing a custom color, be sure to make enough to cover both boots for consistency. You can use color wheels as a guide for creating unique shades.
Remember that the paint will likely dry a bit darker than it appears when wet. You can always adjust the color and apply another coat if needed. Building the color up slowly gives you more control and a much more durable and professional finish.
Step 3: Detailing and Custom Designs
Once your base color is solid and dry, the real fun begins! This is your chance to add personality with intricate details and custom designs. Whether you’re painting flowers, geometric shapes, or a favorite character, this is where your boots become one-of-a-kind.
Use a fine-tipped brush as a point guide for creating sharp lines and small details. You can mix unique colors by combining different Angelus paints. For example, adding a little black will darken a shade, while a little white will create a pastel version. Feel free to get creative and experiment with different patterns and color combinations.
Don’t worry about the final shine just yet; you can choose a gloss, satin, or matte finish during the sealing stage. Focus on bringing your artistic vision to life. If you make a mistake, you can often wipe it away quickly with a damp cloth if the paint is still wet, or simply paint over it once it’s dry.
Step 4: Drying, Sealing, and Finishing Touches
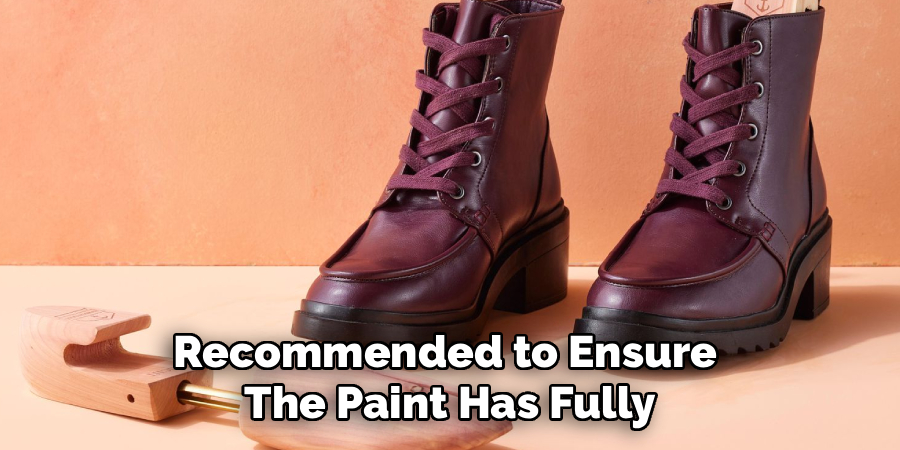
After you’ve finished painting and are happy with your design, you must let the boots dry completely. How long does painted leather boots take to dry? A full 24 hours is recommended to ensure the paint has fully cured. The surface should not feel tacky to the touch.
Next, it’s time to seal your work. What sealant or finisher should I use after painting leather boots? An Angelus Acrylic Finisher is the perfect choice. It adds a protective layer that guards against scuffs and water, ensuring your design lasts. Apply a thin, even coat of the finisher with a soft cloth or a sponge brush. You can choose from different sheens, like a matte finish for a modern look or a high-gloss for a perfect shine.
Allow the finisher to dry for at least another 24 hours before you wear the boots or add any final embellishments like laces. This final step is crucial for protecting all your hard work and giving your boots a professional, polished appearance.
Tips for Achieving Durable and Professional Results
Achieving a look that is both beautiful and durable is the ultimate goal. To get the best results, focus on consistency at every stage of the process, from preparation to the final seal. This ensures the consistancy of finish and provides the most protection for your artwork.
A properly sealed project will have a uniform gloss (or matte, or satin) and will be able to withstand the normal wear and tear of being worn. Taking your time and not cutting corners are the best tips for a project you can be proud of. The following sections will offer more specific advice on preventing common issues and choosing the right application method.
Preventing Cracks, Peeling, and Fading
How can I make sure the paint on leather boots doesn’t crack or peel? The answer lies in following the core principles of leather painting correctly. Cracking and peeling are almost always caused by improper leather preparation or applying the paint too thickly.
When the original factory finish isn’t fully removed, the paint has nothing to grip onto, leading to poor paint adhesion. Similarly, a single, heavy coat of paint is less flexible than several thin ones and is more likely to crack as the boot flexes. For excellent results, you must be patient and methodical.
Follow these key tips to ensure your design lasts:
- Don’t Skip Prep: Always use a leather preparer and deglazer to strip the surface.
- Apply Thin Coats: Build up your color with multiple thin, even layers, letting each one dry in between.
- Use the Right Paint: Stick to flexible acrylic paints designed for leather.
- Seal Your Work: Apply an acrylic finisher to protect the paint from the elements and everyday wear.
Choosing Between Brush and Spray Paint Methods
Is it better to use spray paint or brush paint on leather boots? While spray painting can be an option for large, single-color projects, this guide focuses on the brush-on method for several key reasons. Using a brush paint offers far more control, especially when creating detailed and multi-colored designs.
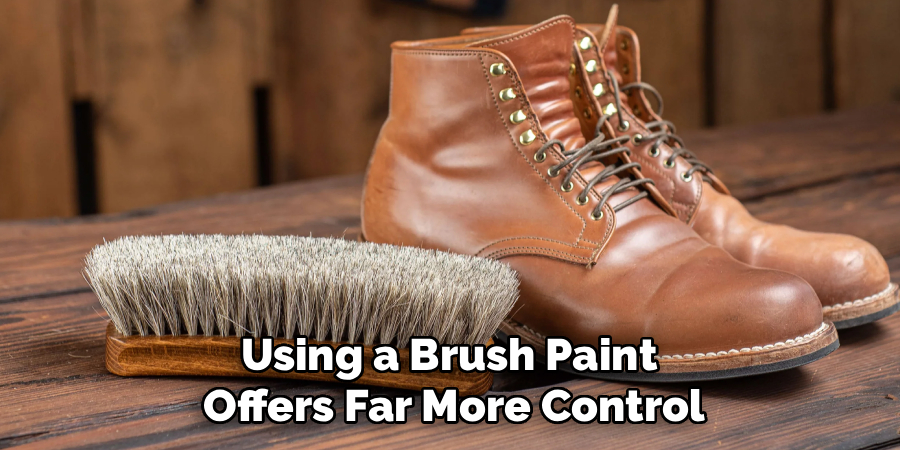
Products like Angelus Leather Paints are formulated for brush application, giving you a smooth finish without the need for special ventilation or masking that spray painting requires. A brush allows you to work the paint into the leather for a strong bond, providing the most protection against wear. For a perfect shine and even application, a brush or sponge gives you direct control over the thickness and texture.
Here’s why the brush method is often preferred:
- Precision and Control: Ideal for intricate designs and clean lines.
- Better Adhesion: Allows you to work the paint into the leather surface.
- Ease of Use: Requires no special equipment or extensive setup.
Creative Ideas and Special Techniques for Leather Boots
Once you’ve mastered the basic techniques, a world of creative possibilities opens up. Don’t be afraid to experiment! By mixing paints, you can achieve infinite variation and create a truly custom color palette. This is your chance to turn a simple pair of boots into a statement piece.
You can create vibrant colors, soft pastels, or deep, rich tones. Consider adding patterns, gradients, or even replicating textures. The following sections will give you some ideas for specific boot styles and advanced techniques to take your leather painting projects to the next level.
Painting Cowboy Boots and Unique Styles
Are there any special tips for painting cowboy boots? Absolutely! The same core principles apply, but the ornate stitching and multiple panels on cowboy boots offer a unique canvas. You can choose to paint the entire boot a new color or use the existing stitch patterns as a guide for adding colorful accents.
These unique styles are perfect for creative expression. Consider using a pastel color for a modern, unexpected twist on a classic design. To create a pastel, simply mix a small amount of white paint into your chosen color. The detailed nature of cowboy boots makes them a rewarding project.
Once painted, a particularly artistic pair could even be used as a striking piece of home decor on a shelf or mantelpiece. The key is to take your time with the detailed sections and use a fine-tipped brush for precision around the stitching and panels.

Combining Dyeing and Painting Effects
Can I dye and paint leather boots in the same project? Yes, you can, and it’s a fantastic way to create deep, multi-dimensional painting effects. Dyeing penetrates the leather and changes its base color, while painting sits on top. This combination is perfect for advanced leather projects.
To do this, you would first dye your boots according to the dye manufacturer’s instructions. Once the dye is completely dry and the leather is conditioned, you can prep the surface again (gently) and apply a new coat of paint for your details. This allows you to have a rich, uniform base color with crisp, painted designs on top.
This two-step process can yield stunning results, giving your boots a level of depth and customization that painting alone might not achieve. Just be sure to allow adequate drying time between the dyeing and painting stages to ensure both products adhere properly.
Frequently Asked Questions
How long should I let my painted leather boots dry?
For best results in leather painting, allow your leather boots to dry for at least 24 hours after the final coat of paint. After applying the Angelus Acrylic Finisher, let them dry for another 24 hours before wearing. This extended drying time ensures the paint and sealant are fully cured.
Can I paint over existing designs or colors on leather boots?
Yes, you can paint over existing colors. The key is thorough preparation. Use a leather preparer like Angelus Leather Preparer to strip the old factory finish and paint. This ensures the surface is ready for a new coat and provides excellent paint adhesion for your new design.
Which sealant or finisher works best to protect painted leather boots?
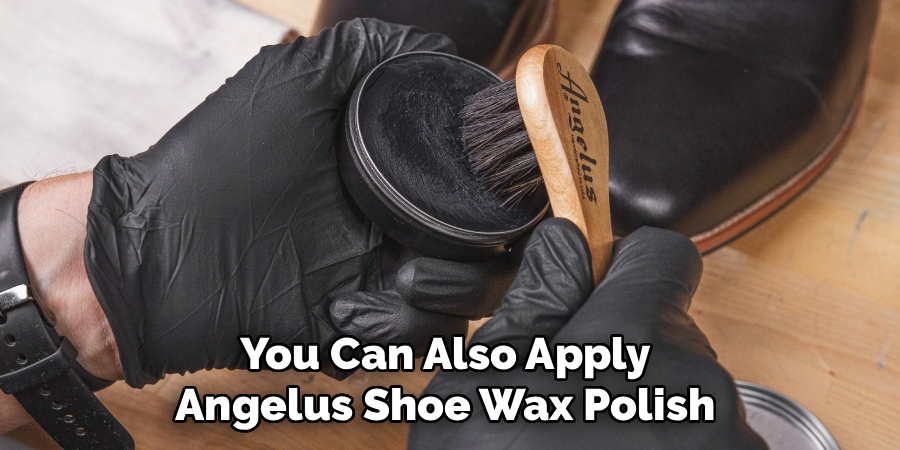
The Angelus Acrylic Finisher is ideal for creating a durable protective layer over your paint. It comes in various sheens to create a uniform gloss or matte look. For extra protection and a perfect shine, you can also apply Angelus Shoe Wax Polish after the finisher has fully cured.
Are there any special precautions for painting older or vintage boots?
For older boots, the leather preparation step is still crucial but be gentle. Use isopropyl alcohol on a cloth sparingly. Because vintage leather can be dry, it’s vital to rehydrate it thoroughly with a shoe cream and quality shoe polish after painting and sealing to achieve the best results.
Conclusion
In summary, painting leather boots can be a rewarding and creative endeavor that allows you to express your personal style. By understanding the compatibility of leather and paint, gathering the right materials, and following our step-by-step guide, you’ll be well on your way to transforming your footwear. Remember to take the necessary precautions to ensure durability and a professional finish. Experimenting with different techniques and styles can lead to stunning results that breathe new life into your favorite pairs. So, grab your supplies and unleash your creativity—your dream leather boots are just a paintbrush away! If you need any assistance or personalized tips, don’t hesitate to reach out for a free consultation!